Why Canvas Tent Repair Skills Are Essential for Your Investment
Canvas tent repair is a crucial skill that can save you thousands of dollars and extend the life of your camping investment by years. Instead of replacing an entire tent due to a small tear or hole, learning basic repair techniques allows you to fix most damage in under an hour with simple tools and materials.
Quick Canvas Tent Repair Solutions:
- Small tears (under 1/2 inch): Clean area, apply waterproof canvas patches inside and outside with tent glue, let cure 24 hours
- Large tears: Sew tear closed first, then apply patches with glue on both sides, seal edges with seam sealer
- Essential tools: Canvas patches, waterproof tent glue, sewing awl, waxed thread, seam sealer
- Patch shape: Always use circular patches – rounded corners prevent peeling and last longer than square patches
- Repair time: Most repairs take 30-60 minutes plus drying time
Canvas tents represent a significant investment, especially for glamping operations where durability directly impacts your bottom line. Regular maintenance and timely repairs can prevent small issues from becoming expensive replacements.
The truth is, canvas tents are built to last decades when properly cared for. Even high-quality tents face damage from UV rays, falling branches, wildlife encounters, and normal wear from frequent use. The good news? Most damage is completely repairable with the right approach.
I’m Caitlyn Stout, founder of Stout Tent, and I’ve spent years perfecting canvas tent repair techniques across six continents where our tents face everything from desert sandstorms to jungle humidity. Through working with commercial clients and individual triprs, I’ve learned which repair methods actually work long-term and which ones fail after the first rainstorm.

Understanding Canvas Tent Damage and Prevention
Just like any beloved piece of gear, our canvas tents face a variety of challenges in the wild. Knowing what causes damage is the first step to preventing it, keeping our investment safe and sound for years of trips.
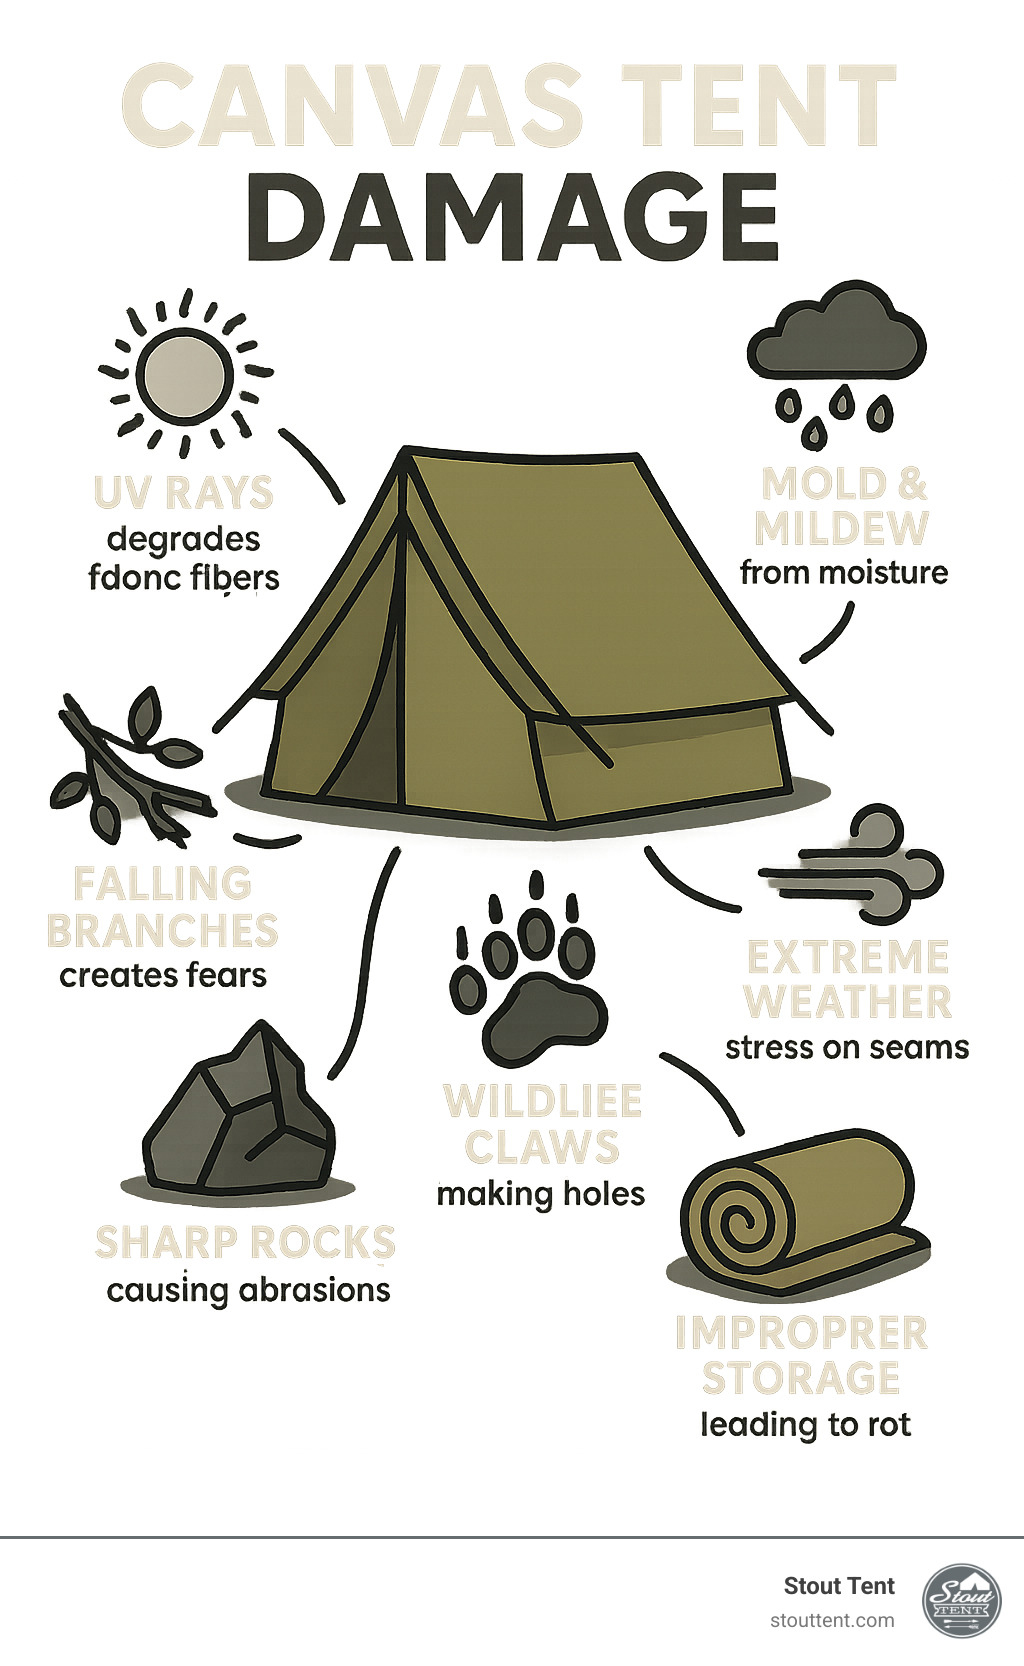
So, what are the common culprits behind canvas tent damage? We’ve seen it all, from the obvious to the surprisingly subtle:
- Environmental Factors:
- UV degradation: Prolonged exposure to the sun’s harsh UV rays can weaken canvas fibers over time, leading to brittleness and tears.
- Mold and mildew: These are perhaps the biggest enemies of canvas. They thrive in damp, dark conditions and can rapidly spread, leading to unsightly stains, unpleasant odors, and eventually, rot.
- Rot: This is the terminal stage of mold and mildew, where the canvas fibers actually break down, creating permanent damage.
- Extreme weather: High winds can put immense stress on seams and fabric, leading to tears. Hail can also cause impact damage.
- Physical Damage:
- Abrasions: Rough ground, sharp rocks, and even repeated folding in the same spot can cause friction and wear down the canvas. Using a waterproof tarpaulin under the tent can protect it from these abrasive elements.
- Sticks and stones: Falling branches, sharp tent stakes, or even kids playing with sticks too close to the tent can easily puncture or tear the fabric.
- Wildlife: Curious critters, attracted by food smells or simply exploring, can chew or claw their way into your tent.
- Accidental damage: This includes anything from a dropped lantern to a misplaced pocket knife or even roughhousing near the tent.
To prevent such damage, we always emphasize proactive care. Using a waterproof tarpaulin under your tent provides a crucial barrier against abrasive ground elements. Similarly, a heavy-duty Bell Tent Fly can shield the tent roof from falling debris, harsh sun, and extreme weather.
Proper site selection is also paramount. When choosing your perfect camping spot, think about potential hazards like overhanging branches or uneven ground. For more tips on this, check out our guide on Choosing the Perfect Campsite for Your Family. And always remember to keep food and scented items out of the tent to avoid attracting unwanted wildlife attention. Cooking meals in a separate area from where you sleep also helps prevent smells from sticking to the fabric.
How to Properly Store Your Tent
Proper storage is arguably the most critical factor in extending the lifespan of your canvas tent. We often say, “Never pack a wet tent!” This is rule number one. Ensuring the tent is completely dry before packing it away is non-negotiable to prevent mold and mildew growth.
Once clean and dry, store your tent in a cool, dry, and dark place. Avoid damp basements or areas prone to flooding, as these are prime environments for mold, mice, and mites to flourish. Keeping the tent off the floor, perhaps on a pallet or in a large, clean plastic garbage can with a lid, adds an extra layer of protection.
When it comes to packing, there’s a debate: folding versus stuffing. While traditionalists might prefer meticulous folding, repeatedly folding a tent in the same way can actually weaken the canvas fabric over time by creating stress points. Stuffing a tent, on the other hand, can lead to more even wear across the fabric, reducing these concentrated stress areas. Whether you fold or stuff, the key is to ensure the tent is clean and completely dry to prevent moisture from getting trapped, which leads to rot and mildew.

The Importance of Regular Cleaning and Seasoning
Beyond preventing tears, regular cleaning and seasoning are essential for the long-term health of your canvas tent. How often should canvas tents be cleaned and re-treated to prevent damage? This depends heavily on usage, location, and your specific tent’s condition, but we generally recommend cleaning and retreating your tent every 3-6 months of use.
Spot cleaning is your first line of defense. Address dirt, mold, and mildew promptly. Letting your tent become overly dirty or moldy makes it significantly harder to restore it to its “like-new” state. For detailed guidance, our blog on Treating Your Canvas Tent Properly offers in-depth information on deep cleaning, especially for moldy canvas.
Canvas tents also need to be seasoned and re-waterproofed periodically. New canvas tents may “mist” in driving rain initially because the natural weave hasn’t fully tightened. Seasoning, which involves wetting the tent and allowing it to dry completely, causes the cotton fibers to swell and then shrink slightly, tightening the weave and increasing its natural water resistance. Think of it like a new pair of denim jeans; they shrink a little when you wash them, and so does canvas! Our comprehensive guide on Seasoning Your Canvas Tent walks you through this crucial initial step.
After cleaning or significant use, reapplying a waterproofing treatment is vital to maintain the tent’s water, mold, and UV resistance. These treatments also protect against sun and dirt, which can degrade the fabric. Regular cleaning and re-treating prevent rot and maintain the fabric’s integrity, ensuring your tent remains a reliable shelter for years to come.
Your Step-by-Step Guide to Canvas Tent Repair
Even with the best preventative care, life happens. A curious squirrel, an unexpected storm, or just the natural wear from countless camping memories can leave your beloved tent with a tear or hole. But here’s the good news – canvas tent repair is surprisingly straightforward, and you don’t need to be a master craftsperson to do it well.
There’s something deeply satisfying about fixing your own gear. It’s empowering to know that a small rip doesn’t spell the end for your tent. With the right approach, you can create repairs that are actually stronger than the original fabric. Whether you’re dealing with a tiny puncture from a tent stake or a larger tear from a falling branch, the techniques we’ll cover – patching, sewing, gluing, and sealing – will get your tent back to trip-ready condition.
The key to successful canvas tent repair lies in taking your time and doing it right the first time. A rushed repair often means doing the job twice, so let’s walk through the process step by step.

Essential Supplies for Canvas Tent Repair
Before you can fix anything, you need the right tools for the job. While you can buy pre-made repair kits, I’ve found that building your own gives you better quality materials and more flexibility for different types of damage.
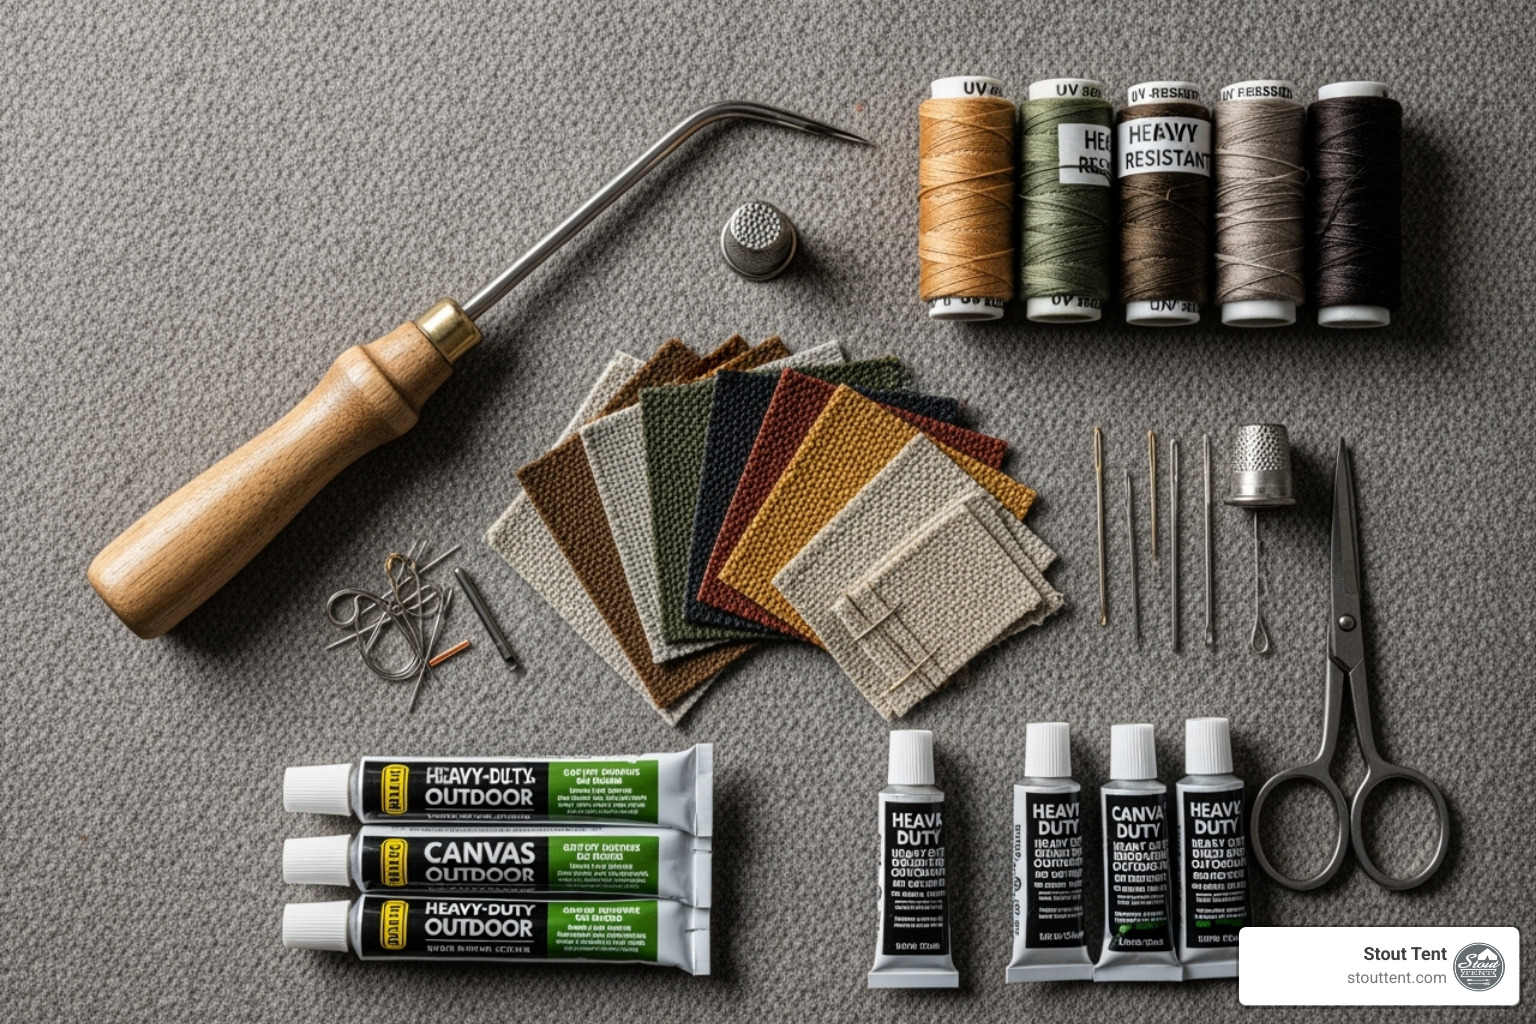
Your repair arsenal should include canvas patch material that matches your tent as closely as possible. Look for 10oz cotton ‘army duck’ Sunforger fabric – it’s tough, treated for weather resistance, and bonds well with most canvas tents. You’ll also need waterproof canvas glue like Bish’s Tear Mender or quality shoe glue. Barge cement works great too, though use it in well-ventilated areas.
The sewing awl is your secret weapon here. The Speedy Stitcher is affordable, portable, and creates incredibly strong lock-stitches that won’t come undone. Pair it with heavy-duty waxed thread – bonded polyester thread handles weather like a champ and won’t rot over time.
Don’t forget the finishing touches: sharp scissors for clean patch cuts, rubbing alcohol to prep the repair area, canvas seam sealer to waterproof everything, and a flux brush for smooth application. Having these supplies ready means you can tackle repairs immediately instead of watching a small problem grow into a big one.
Patching a Tear: The Sew and Glue Method
This is where the magic happens. The sew-and-glue method creates repairs that are often stronger and more waterproof than the original fabric. It might seem like overkill, but trust me – this approach will keep you dry through countless storms.
Start by cleaning the damaged area thoroughly with rubbing alcohol. Any dirt or grime will prevent your patch from bonding properly, so take your time here. Once everything’s clean and dry, you’re ready for the real work.
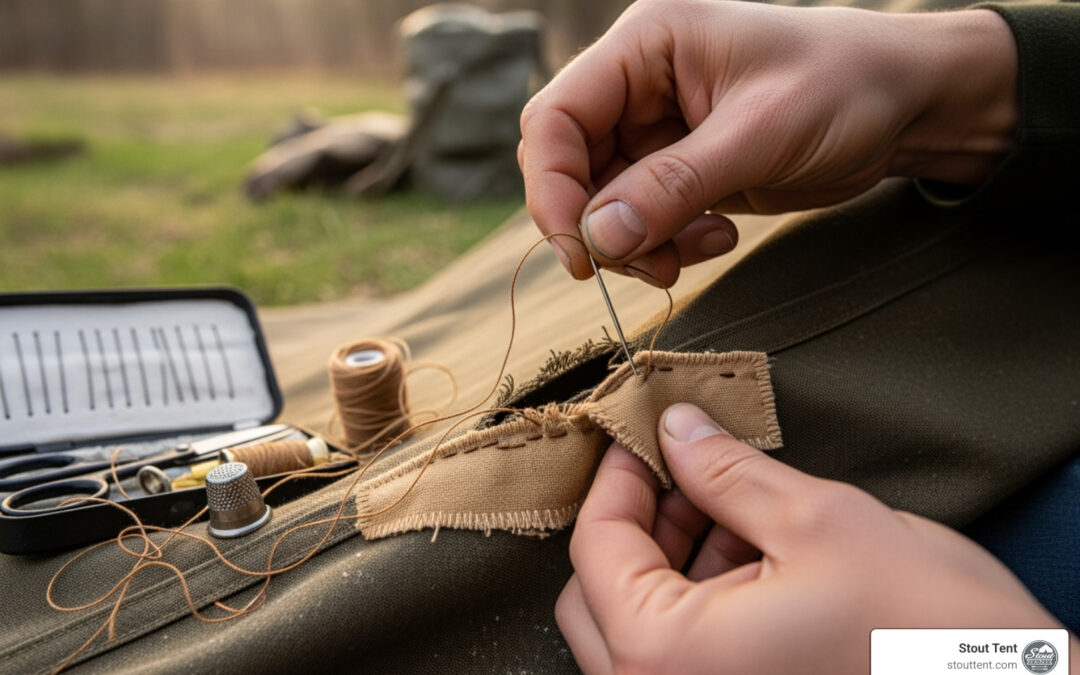
For tears larger than a pinhole, sew the tear closed first using your sewing awl and waxed thread. This step is crucial – it prevents the tear from spreading and gives your patch a solid foundation. Use a lock-stitch with short, neat stitches close together. If you’ve never used a sewing awl before, check out this helpful tutorial on how to use a sewing awl. The lock-stitch it creates is incredibly strong and won’t solve.
Now comes the patching. Cut circular patches rather than square ones – those sharp corners on square patches tend to lift and fail over time. You’ll need two patches: one for inside the tent and one for outside. Make them generous, overlapping the damage by at least 1.5 to 2 inches on all sides.
Apply your waterproof glue evenly to the first patch and press it firmly over the sewn tear on the inside of the tent. Work out any air bubbles – they can create weak spots. Repeat this process on the outside with your second patch. This double-patch approach creates a repair that’s both structurally sound and completely waterproof.
Apply steady pressure with something heavy and flat while the glue cures. Most adhesives need several hours to set properly and up to 24 hours for full strength. Patience here pays off with a repair that lasts for years.
Sealing the Deal: How to Waterproof Your Repair
You’re almost there, but this final step is what separates a good repair from a great one. Even the tiniest needle hole can let water through, so proper sealing is essential for staying dry.
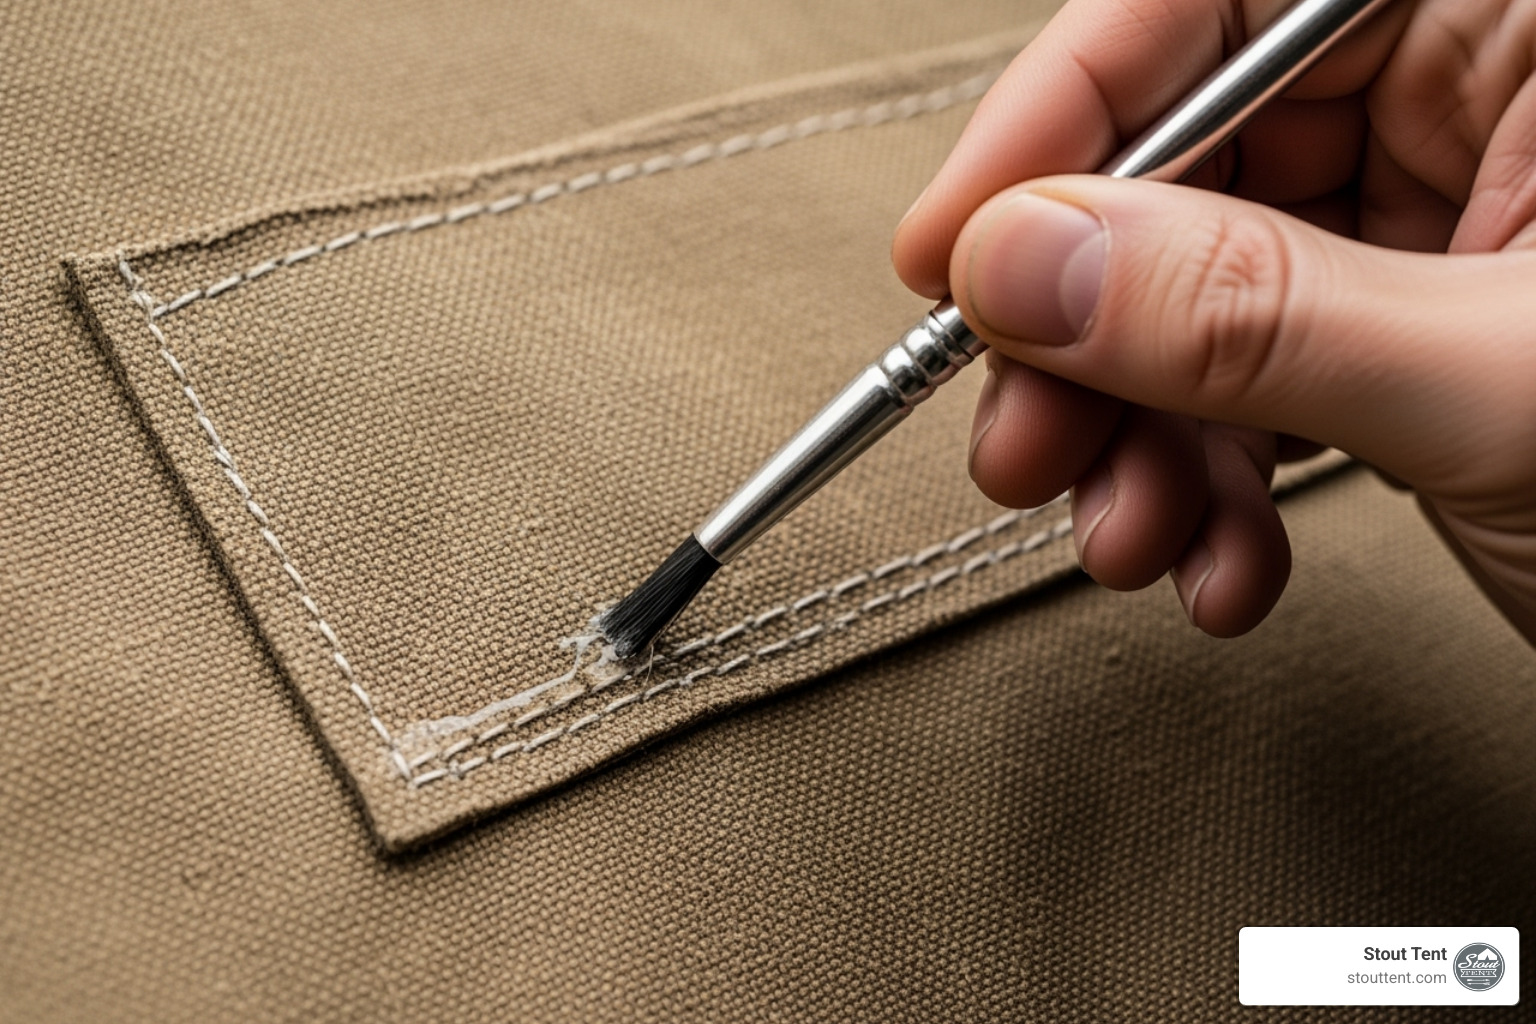
Apply seam sealer directly over your stitches first. This fills those tiny holes where your needle went through and creates a continuous waterproof barrier. Don’t be stingy – it’s better to use too much than too little.
Next, seal the edges of both patches with a generous bead of seam sealer. Use your flux brush to spread it evenly, making sure it bonds well to both the patch and the original tent fabric. You’re creating a seamless barrier that water simply can’t penetrate.
The goal is a watertight seal that looks and performs like it was always part of your tent. Give the sealer at least 24 hours to cure completely in a well-ventilated area. For more detailed guidance on sealing techniques, our resource on Repairing Your Tent Seam covers similar waterproofing methods.

When done properly, your repair should be virtually invisible and completely waterproof. In fact, many of our customers tell us their patched areas have outlasted the rest of their tent fabric. That’s the beauty of taking time to do canvas tent repair right – you end up with gear that’s ready for whatever trips lie ahead.
Advanced Repair and Maintenance Tips
When you own a Four Season Tent, you’re dealing with gear that’s built to handle serious weather and extended use. That means your maintenance approach needs to be equally serious. Canvas tent repair at this level isn’t just about fixing problems – it’s about staying ahead of them through proactive care that ensures long-term durability.
Think of it like maintaining a classic car. You can wait until something breaks to fix it, but the smart owners are the ones checking the oil, rotating the tires, and addressing small issues before they become expensive problems. Your canvas tent deserves the same thoughtful attention.
Fixing Small vs. Large Tears: A Quick Guide to Canvas Tent Repair
The size of your tear completely changes your repair strategy. It’s like the difference between putting a band-aid on a paper cut versus stitching up a deeper wound – both need attention, but the approach is totally different.
Small tears under half an inch can often be handled with our glue-only patch method. Start by cleaning the area thoroughly, then cut two small, rounded canvas patches that extend about an inch beyond the tear. Apply waterproof canvas glue to the back of each patch, carefully position them on both sides of the tent, and press firmly. Apply some weight and let everything cure for a full 24 hours before sealing the edges with seam sealer for extra waterproofing.
This simpler method works great for tiny punctures or small rips in low-stress areas. It’s quicker and less involved than sewing, which makes it perfect for those “oops” moments that happen around camp.
Large tears are a completely different story. For anything bigger than half an inch, or any tear that’s near a seam or high-stress point, you absolutely need to use the full sew-and-glue method we covered earlier. The stitching provides the structural backbone your repair needs, while the patches and glue handle waterproofing and reinforcement. Trust me on this one – trying to fix a large tear with just glue is like trying to hold a heavy door with scotch tape. It might work for a minute, but it’s going to fail when you need it most.
When should you seek professional repair? Sometimes even the most dedicated DIYer needs to call in the pros. If you’re looking at extensive damage like a large rip spanning multiple panels, a torn-out grommet, or significant seam separation that makes you nervous, it might be time to find a professional canvas repair shop. While we’re huge believers in DIY repairs, there are times when specialized equipment and years of experience make all the difference.
Sewn vs. Iron-On Patches: What’s Best for Canvas?
Here’s where I see a lot of people make a mistake that comes back to haunt them later. Iron-on patches seem so convenient – just heat them up and stick them on, right? But for canvas tents, sewn patches are almost always the superior choice for durability and longevity.
Sewn patches create a mechanical bond with your tent fabric that’s incredibly strong. They offer excellent weather resistance, especially when properly sealed, and with basic sewing skills (which are easier than you think with a good awl), they’re quite manageable to apply. The best part? A well-done sewn patch can last for years, often the entire remaining life of your tent.
Iron-on patches, while super simple to apply, have some real limitations for serious outdoor use. The adhesive can fail over time, especially with moisture and temperature changes. They’re often just a temporary fix, prone to peeling and curling at the edges. They can also look bulky and obvious, which might not bother you functionally but can be annoying aesthetically.
Our honest recommendation? Iron-on patches work great as a temporary, emergency fix when you’re out in the field and need to get through the night. But for any lasting, reliable repair on an investment like your canvas tent, the sew-and-glue method is the way to go. It compresses the canvas around the damage, creating a much stronger bond that will stand up to wind, rain, and years of use.
Think of it this way – you wouldn’t use duct tape to fix a leak in your roof at home, so why settle for a quick fix on the shelter that protects you in the wilderness?
Frequently Asked Questions about Canvas Tent Care
Over the years, we’ve fielded countless questions from fellow camping enthusiasts about keeping their canvas tents in tip-top shape. These are the questions that pop up most often in our inbox, and honestly, they’re the ones I wished someone had answered for me when I was starting out!
Should I patch the inside, outside, or both?
This is probably our most popular canvas tent repair question, and the answer is always the same: patch both sides for the best results. I know it seems like extra work, but trust me on this one.
The inner patch acts like the foundation of your repair – it provides crucial structural support and prevents the tear from spreading further. Think of it as the backbone of your fix. The outer patch, meanwhile, is your tent’s first line of defense against rain, wind, and everything else nature throws at it.
When you use patches on both sides, you’re essentially creating a canvas sandwich that’s often stronger than the original fabric. It’s like reinforcing a weak spot in a wall – you wouldn’t just patch one side and call it good, right?
What kind of stitch is best for canvas?
A lock stitch is absolutely the way to go for canvas repairs. This is the same type of stitch that sewing machines create, and there’s a good reason for that – it’s incredibly strong and secure.
When you use a sewing awl to create a lock stitch, each stitch locks into the next one, creating a chain that won’t solve even if one stitch breaks. It’s like having a backup plan for your backup plan. Regular running stitches or simple in-and-out stitches just don’t have that same reliability, especially when your tent is getting buffeted by wind or stretched tight.
The beauty of the lock stitch is that it distributes tension evenly across the repair, which means your fix will move and flex with the tent instead of creating a rigid spot that’s prone to tearing again.
How can I prevent condensation inside my tent?
Ah, the age-old condensation battle! Proper ventilation is your secret weapon here. Even on chilly nights, try to keep at least one window or vent cracked open. I know it sounds counterintuitive when you’re trying to stay warm, but that little bit of airflow makes a huge difference.
Moist air needs somewhere to go, and if it can’t escape, it’ll condense on your tent walls faster than you can say “soggy sleeping bag.” A quality tent fly also works wonders by creating an insulating air gap between the fly and your tent – it’s like giving your tent a little breathing room.
For a deep dive into conquering condensation (including some tricks that might surprise you), check out our comprehensive guide on How to Prevent Tent Condensation. It’s packed with practical tips that actually work in real-world camping situations.
Conclusion
There’s something deeply satisfying about fixing something with your own two hands, especially when it’s gear that’s been your trusted shelter through countless outdoor trips. Canvas tent repair isn’t just about saving money (though that’s certainly a nice bonus) – it’s about taking control of your gear and ensuring your tent is ready for whatever nature throws your way.
Throughout this guide, we’ve covered everything from understanding what causes damage in the first place to mastering the sew-and-glue method that creates repairs stronger than the original fabric. We’ve talked about the importance of proper storage, regular cleaning and seasoning, and how to build a repair kit that’ll handle anything from tiny punctures to significant tears.
The truth is, every canvas tent will eventually need some TLC. It’s not a sign of poor quality – it’s simply the reality of using gear in the great outdoors. What matters is knowing how to respond when damage happens, and now you do.
At Stout Tent, we’ve learned these repair techniques the hard way, maintaining hundreds of tents across large-scale glamping operations nationwide. We’ve seen what works and what doesn’t, which repairs last years and which ones fail after the first storm. That real-world experience shapes everything we teach, from the circular patch technique to the importance of sealing every stitch.
Proper care and regular maintenance prevent most major repairs from ever being necessary. A little attention to storage, cleaning, and prevention goes a long way toward keeping your tent in excellent condition.
With the right tools and techniques, you can keep your Canvas Tent in prime condition for countless trips. For all your maintenance needs, from cleaning solutions to replacement parts, explore our full range of tent accessories.
Now get out there and enjoy your perfectly maintained tent – you’ve earned it!

